
Quickstart#
To use plantgl, run ipython as follows:
ipython --gui=qt
Warning The option
--gui=qtis mandatory to display correctly into the plantgl viewer.
Import all modules:
from openalea.plantgl.all import *
Scene creation#
The different PlantGL primitives are assembled into a scene graph object. To create such an object:
scene = Scene()
Create a shape#
Some primitives can be instantiated with material properties. For example, a red cylinder:
c = Cylinder(1, 10)
color = Material(Color3(255,0,0),0,Color3(0,0,0),Color3(0,0,0),1,0)
shape = Shape(c, color)
See also: tutorial.md
Visualize the scene#
This form can be added to the scene using the Viewer:
scene.add(shape)
Viewer.display(scene)
Output#
The actual view can be saved into PNG format. Background color and grid can be set as follows:
Viewer.frameGL.setBgColor(255,255,200)
Viewer.grids.setXYPlane(True)
Viewer.grids.setYZPlane(False)
Viewer.grids.setXZPlane(False)
Viewer.frameGL.saveImage("_images/result.png")
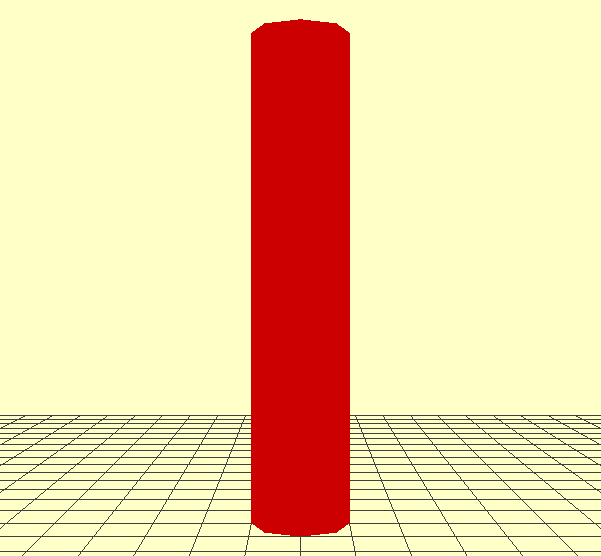 { width=”50%” }
Applying Algorithms#
Several algorithms can be applied to the scene. For example, to calculate the scene bounding box:
bbc = BBoxComputer()
scene.apply(bbc)
boundingbox = bbc.result
Turtle Geometry#
To easily assemble different shapes in an iterative way, turtle geometry was introduced in PlantGL. To use it, create a turtle object that will record the various drawing actions to produce a final representation. For example, to produce a torus:
turtle = PglTurtle()
for i in range(12):
    turtle.left(30).F(1)
scene = turtle.getScene()
Viewer.display(scene)
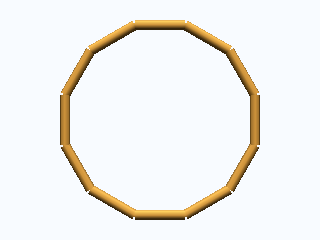 { width=”40%” }